Friday, November 2, 2007

Take 2! Ravioli Caprese


Nearing the end of the long week, dinner more then likely consists of a smorgasbord of leftover items. Last Sunday I made a pound of Asian Peanut Noodles, NH's favorite. I'd promised it to him that morning, and despite a little tiff in which I threatened to make him no dinner, he got his wish. It's a terrific recipe, very easy to make but I probably shouldn't have made the full pound. NH happily ate it for dinner on Sunday, Tuesday, and Wednesday night- and there is still some left!

I tend to be a scavenger most week nights- salad here, soup there. Monday night was a beautiful portobello veggie stir fry that I shared with A who came over to do some party planning. It was great but after two dinners I needed something new.

Despite all the leftovers in the fridge, I was itching to cook last night. So, I decided to take another stab at the Ravioli Caprese from scratch. I took out the leftover filling and added a little more ricotta, basil, and grated cheese to fill it out. I took out my apron, rolled up my sleeves, got the water ready on the stove, and proceeded with the dough.

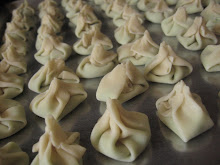
Right away I noticed a difference, and learned a lesson- it really does pay to review the directions. I used very hot rather than boiling water and stirred the flour in to form the dough. I let it sit for exactly the 10 minutes, than divided it into four pieces. Once again, sticky sticky- but a much more cohesive and workable dough. I worked quickly and used a new biscuit cutter to cut out the ravioli (more versatile than a ravioli stamp). It made pretty scalloped edges which I liked. I used the four sections of dough, then rolled out the scraps from each to make a few more.

The ravioli cooked in 3-4 minutes, and we sat down to a delicious dinner of homemade ravioli. I made the same sauce but with less olive oil and more lemon zest. NH christened this as one of his very favorite dishes, up there with the peanut noodles. From him that's saying something!

So the moral of the story is: if a recipe doesn't come out well the first time or seems too difficult, don't be discouraged. Learn from the difficult parts and try again! You'll improve a thousand times with just one try, and it will only continue to get better as you perfect it. I know I'll be making this ravioli dough again soon, with this filling or one of my own concoction.

Monday, October 22, 2007

Recipe- Ravioli Caprese

Sometimes I'm too ambitious, especially since I do get very upset if a dish doesn't turn out right. NH watches me with amusement and a little annoyance when things aren't going right in the kitchen. I can develop a pretty fatalistic attitude (it's not going to be edible, it's not worth it, we should get the phone to be ready to order takeout, etc). Sunday night was one of these nights, but fortunately it had one of the better endings.

I was home early on Friday evening and caught a newish episode of 'Everyday Italian' on the Food Network. Each dish was inspired by a different island Giada has visited in Italy- Capri, Sicily, and Sardinia. The first item on the menu was 'Ravioli Caprese,' from Capri. Immediately I was paying attention- Capri is pretty high on my list of places I'd just die to go to. Then, she started the dough.
This dough is just flour and water- just flour and water! Usually there is some kind of binder like egg in dough, so this intrigued me. I'd say I've recently hit intermediate level with dough, and I knew this was something different and interesting. The filling she made- chicken, ricotta, and basil- sounded yummy, as did the sauce- olive oil, lemon zest, and more basil. Yum! Always more basil, can't have enough.

Right away I decided I was going to make them Sunday night- I wouldn't be home to make dinner until then. NH would help me and we would make dinner together in a nice romantic way.
I searched several stores for a ravioli stamp and had no luck. I figured I'd use a stainless steel measuring cup until I realized the handle would be in the way. Without getting too nitty-gritty, in the end we used a champagne flute to stamp out the dough- yes! It actually worked out fairly well, that bit at least.

Ravioli Caprese
adapted from recipe by Giada de Laurentiis

Dough
2 1/2 cups all-purpose Flour, plus more for dusting
1 cup very hot water

Filling
3/4 cup part-skim ricotta
1 egg
1/2 cup finely shredded rotisserie chicken
1/4 cup shredded Fontina, Parmesan, and Asiago
2 Tablespoons finely chopped Basil
1/2 teaspoon salt
1/4 teaspoon pepper

Sauce
3 Tablespoons olive oil
3 Tablespoons fresh Basil, chopped
2 teaspoons grated Lemon zest
1/2 teaspoon salt
1/4 teaspoon pepper

Dough: In a large bowl, combine flour and water. Stir to combine with a wooden spoon, into a large ball. Cover with plastic wrap and let sit for 10 minutes.
Filling: Combine all ingredients in a medium bowl and stir to combine.

Cut the dough into 4 evenly sized pieces (the dough will be sticky!). Add extra flour as necessary for rolling but use only a little as needed. For each piece into a 2 x 6 inch rectangle. Recover the dough with plastic wrap.
Lightly dust the work surface and a rolling pin working with 1 piece of dough at a time, roll the dough into a 4 x 19 inch rectangle, approximately. Place 9 rounded Tablespoons about 1 inch apart down the center of the dough. Flip the dough over the filling. Press down around the edges again with your fingertips to seal. Place the finished ravioli on wax paper and continue with the remaining dough and filling.
Bring a large pot of salted water to a boil. Add half the ravioli and cook, stirring occasionally, until they float to the surface, 3-4 minutes. Drain into a serving bowl and cook the remaining ravioli.


Pour the olive oil over the cooked ravioli. Add the basil, lemon zest, salt, and pepper. Gently toss to coat and serve immediately.


NH did a great job preparing the filling, and I made the dough. It was more difficult to work with than I thought it would be. Very sticky for starters. Next I made the mistake of not rereading the recipe and where I should have divided the dough to start with I did not, so it was probably a little overworked. As we were stamping the ravioli out some had difficulty sealing the filling in and it poked out; both of us figured at least some of them would fall apart. But as you can see, they hung together! My trouble with the dough caused us to have fewer ravioli than the recipe should have made, but we ate them all! Each was supposed to be pillow-light; a few were but there were some that I could tell were heavier than they should have been. Next time I'll work on the dough more and learn from this experience.

We froze the remaining filling that we didn't use, so I can't wait to make another batch!

Recipe- Cherry Crostada


Summer dessert in the middle of October? Yes! Frozen berries- yes, frozen- are terrific quality these days, have you noticed? I could make peach cobbler for NH in January if I wanted.
NH and I had dinner with MIL and FIL (aka Mother-in-Law and Father-in-Law) in Walnut Creek on Saturday. Finally we got to taste the very famous paella that FIL makes on the charcoal barbecue outside. As my contribution to dinner I made this dessert. It was quite a culinary adventure, begun in San Mateo and finished in the oven in Walnut Creek. I made the dough at home in the morning. During the hour drive, my dough sat in between the bags of frozen berries to stay cold. I brought along my rolling pin and pie dish, and two little baggies filled with flour, and sugar and cornstarch.
When it came time to assemble and bake, I simply dumped the thawed berries in a bowl with the sugar and cornstarch, gave it a stir, and poured into the pie dish. I then rolled out the dough, put it over the fruit, and baked until it bubbled.
I know it was well-received by NH and FIL, who love cherry desserts. True to form, NH ate the leftovers we took home for breakfast in the morning. :-)


Cherry Crostada

1 cup all-purpose Flour
1/2 cup whole wheat pastry Flour
2 Tablespoons sugar
zest of 1 Lemon
1/4 teaspoon salt
10 Tablespoons unsalted butter, chilled and cut into 1/2 inch pieces
3 Tablespoons ice water

5 cups (about 30 ounces) frozen cherries, thawed
1 1/2 Tablespoons cornstarch
2 Tablespoons sugar
juice of 1 Lemon

Combine flour, sugar, lemon zest and salt in a food processor and pulse to blend. Add the butter and pulse until the mixture resembles coarse meal. Add ice water, 1 Tablespoon at a time, and pulse until moist clumps form. Gather the dough into a ball and flatten into a disk. Wrap the dough with plastic wrap and refrigerate until firm, at least 1 hour.

Preheat oven to 400 degrees Fahreinheit.

Stir cherries, lemon juice, sugar, and cornstarch in a 10-inch diameter pie or baking dish. Roll out crust to a 14-inch diameter circle (approximately). Place the crust over the berries, and fold over itself until it fits inside the dish. Cut a 2-inch slit in the center of the dough. Bake until the crust is golden and the berries are bubbly, about 40 minutes.


I realized after that I forgot to cut the 2-inch slit in the dough, which is probably why I had a little berry leakage on one side. I like the color it gave the pie, so I don't mind at all. But you probably don't want any explosions in the oven which is why you do it, so next time I need to remember to cut the slit!

Sunday, October 14, 2007

Recipe- Apple Pumpkin Challah


Today is a bread-baking day.

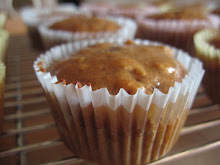
Enough time had passed since my last date with the bread machine, and I was dying to use up the last of the can of pumpkin I opened a week ago. I hate the thought of throwing away something like that because I didn't come up with another way to use it. I made pumpkin muffins a week ago for New Husband, so I popped the leftover pumpkin puree in the freezer and decided on some pumpkin challah.

I wanted to do something a little more special. One of the best bread-machine creations I've ever had is an apple challah recipe. Mom and I made it together a few years ago, back when the machine and the oven were still a total mystery. At the time it was fun, but seemed too difficult to possibly attempt on my own. Lots of time has passed since then. :-) My brilliant idea was to combine the two recipes- the pumpkin challah dough with the apple cinnamon filling.

The pumpkin challah recipe makes 2 braided loafs. I altered the original a bit by substituting whole wheat flour for 1 cup of the all-purpose. I feel I can definitely call this my original recipe with the alterations I've made.
The moist dough emerges from the machine a gorgeous, well... pumpkin color! It feels wonderful in your hands, springy and plump- much less sticky than a pizza dough.

Apple-Pumpkin Challah

Dough:
1/2 cup water
3/4 cup canned Pumpkin puree
3 large eggs
3 Tablespoons light brown sugar
3 Tablespoons walnut oil
3 2/3 cups unbleached all-purpose flour
1 cup Whole Wheat flour
2 teaspoons salt
1 teaspoons gluten
1/4 teaspoon ground ginger
1/4 teaspoon nutmeg
1/4 teaspoon cinnamon
2 1/2 teaspoons SAF yeast

filling:
3 medium tart Apples- peeled, cored, and diced
juice of 1 Lemon
2 Tablespoons honey
1/2 teaspoon cinnamon
1 1/2 Tablespoons melted butter

cinnamon sugar, for sprinkling

Place all the dough ingredients in the pan according to the machine's directions. Program for the Dough cycle and press Start.

Prepare the filling: Combine apples, lemon juice, honey, and cinnamon in a bowl and toss to coat. Cover with plastic wrap, chill, and drain before use in filling the dough.

When the dough cycle ends, turn the dough out onto a lightly floured work surface. Divide the dough in half, and then each half into 3 equal portions. Roll each portion into an approximate 12x3 inch rectangle. Brush with a little melted butter and place 1/6 of the filling down the center of each portion. Starting from the long edge, roll each rectangle and pinch the seams to seal well.

Line a baking sheet with parchment paper. Place 3 ropes parallel to each other and braid the ropes, alternating the outside ropes over the center (not much, but you get the idea). Turn the challah so it covers only half the sheet. Brush with a tiny bit more melted butter and sprinkle lightly with cinnamon sugar. Repeat with the remaining 3 ropes, turn to fit the sheet, brush with melted butter and sprinkle with sugar. Cover both loaves with plastic wrap and let rise at room temperature until doubled in bulk, 45 minutes to an hour. *Do not let is rise any longer, or the challah may collapse in the oven.

15 minutes before you are ready to bake, preheat the oven to 350 degrees Fahrenheit.
Bake for 35 minutes, or until the loaves are golden brown. Cool on a rack before slicing.


This recipe created one of the better smells that have emanated from my kitchen, and I can hardly describe to you the joy and victory I felt when I pulled my perfectly formed creations from the oven.
One loaf is coming to my office tomorrow morning to be shared, and the other has gone straight into the freezer to stay first-day fresh for my in-laws when we visit them next week. Fingers crossed they like it too!

Daytrip to Napa

Torrential downpours dominated Friday, but the clouds parted to reveal blue skies and warm weather on Saturday. What a blessing- this day took New Husband and I to Napa Valley for the day.

It's been a year since our last visit, which was an anniversary trip for just the two of us. That day we visited 4 wineries and had a very romantic dinner at Julia's Kitchen at the Copia in downtown Napa.
This time we met another couple, A (my chef partner!) and J. We hit 5 wineries:
Artesa Winery- beautiful modern facility built right into the hills.
Domaine Chandon- sparkling wines galore
V. Sattui Winery- busy winery with an Italian deli. The tasting was free!
Heitz Cellars- small winery with a much older crowd
Louis D. Martini Winery- good wine but even more memorable breadsticks at the tasting bar

We had lunch on the patio at Domaine Chandon. The four of us split a cheese board and a salmon plate, and A and J split a salad too. The three cheeses- a buttery triple-cream, a veined goat cheese, and a hard sharp aged cheese- were all delicious and came with a chutney jam and plenty of bread. The creme fraiche and greens that accompanied the salmon were also excellent. Domaine Chandon also offers sandwiches in the tasting salon, an option that wasn't available on our last trip.

Dinner was a treat at Cindy's Backstreet Kitchen in St. Helena. We sat outdoors beneath a fig tree; the air was brisk but comfortable, possibly our last chance to eat outside this year. My passionfruit bellini was a nice end to a day with lots of drinking. I abstained from the bread we were given, but it had a wonderful fresh-baked aroma. All four of us enjoyed our entrees- J went for the meatloaf with horseradish barbecue sauce and garlic mashed potatoes; A chose the fish special- halibut with potatoes in a delicious sauce. NH had wood oven duck with potato croquettes and an asian-citrus glaze. My mushroom tamales- with creamy grits, swiss chard, and Yucatean salsa- were delicious and satisfying.
Dessert really put our meal over the top- what a treat! I indulged, and NH and I each ordered our own and shared. Oh man! My Campfire Pie will remain one of the top desserts I have ever had at a restaurant- Toasted marshmallow, fudgy dark chocolate, and almond brittle in a cookie crust. The thick slice of pie was slightly warm and melty from the oven. Every bite was heaven. NH's apple crisp a la mode was deliciously spicy and warm. It had a crunchy crisp crust and soft apples underneath- the scents of ginger and cinnamon were pronounced. There's something delectable about the way a scoop of ice cream melts into a crisp- I alternated bites between the two and was sad to see it gone. I'll return to Cindy's just to eat these desserts! Altogether it was a deeply satisfying dinner, one where all the dishes were perfectly chosen.

Sunday, September 30, 2007

Day 2: Joe Froggers

This dough is really sticky! Watch out, you'll need lots of flour- hands, board, and rolling pin- and a gentle hand to work with this dough. I tore it a few times, but it's forgiving so I was able to do some easy patchwork. I used a drinking glass with a 3 1/2 inch rim since I don't have cookie cutters and it worked great (remember to flour that too!). I wanted to make this first batch as the recipe recommends, but they do come out really big. I like smaller cookies, so next time I'll make them smaller and make more. They smell divine while baking and the cookies look like large cracked saucers. The edges of the cookie are crisp while the interior is soft and chewy. I like the salt mingled with the medley of spices in the cookie. I'll definitely be making these again, especially with the chilly months ahead of us.

Saturday, September 29, 2007

Messy Delicious: Recipe- Joe Frogger cookies

Oh man! I never said I was a tidy chef.

But hey, that means I'm excellent at cleaning up, right? I decided to make cookies today, a recipe for Joe Froggers that I'd wanted to try for a while. It's from the Feb/March 2007 Cook's Country magazine, a great publication that I've subscribed to for over a year. It's a spice cookie with an interesting history- they were originally developed for sailors on long fishing voyages, who could enjoy the cookies since they had no dairy to spoil. I can't resist a historical link like that, plus the combination of rum, molasses, ginger, and salt intrigued me. It sounds like a kicked-up version of one of my favorite wintertime cookies: ginger. Let's see, this recipe could replace the encumbent one.

This cookie needs a little planning, since the dough needs to be refrigerated for at least 8 hours (read: dough one afternoon, bake the next). The dough is made in three parts: dry ingredients, rum and salt, and molasses with baking soda. And I did try to be as neat as possible, but my electric mixer had a nice mane of brown hair as the dough came together. I spent just as much time mopping up my mess as I did with the dough, but fortunately I have gloves and good sponges.

So the dough is in the fridge. Now I must wait patiently until tomorrow to bake them off. New Husband and I are having a late breakfast at our favorite place, Alana's, tomorrow (someday I'll attempt these swedish oatmeal pancakes myself, they are so GOOD). So I'll be having a Joe Frogger for my lunch. :-) Stay tuned for how they turn out.

Joe Froggers
adapted from Cook's Country Feb/March 2007 issue

1/3 cup Dark Rum
1 tablespoon water
1 1/2 teaspoons salt
3 cups all-purpose Flour
3/4 teaspoon ground Ginger
1/2 teaspoon ground Allspice
1/4 teaspoon ground Nutmeg
1/8 teaspoon ground Cloves
1 cup Molasses
1 teaspoon Baking soda
8 tablespoons (1 stick) unsalted Butter, softened but cool
1 cup Sugar

Whisk rum, water, and salt in a small bowl until the salt dissolves. Whisk flour, ginger, allspice, nutmeg, and cloves in medium bowl. Stir molasses and baking soda in a large measuring cup and let sit until doubled in volume, about 25 minutes (the mixture will start to bubble).

With an electric mixer, beat butter and sugar on medium-high speed until fluffy, about 2 minutes. Reduce speed to medium-low and gradually beat in rum mixture. Add one-third of flour mixture, beating on medium-low until just incorporated, scraping down the sides of the bowl as needed. Follow with half the molasses mixture. Add the next third of the flour mixture, followed by the remaining molasses mixture, and finally the last of the flour. Give the dough a final stir with a rubber spatula, then cover the bowl with plastic wrap and refrigerate for at least 8 hours and up to 3 days.

Heat oven to 375 degrees Fahrenheit. Line 2 baking sheets with parchment paper. Liberally flour your work surface, and bring out half the cookie dough. Roll out to 1/4 inch thickness. Using 3 1/2 inch cookie cutter (substitute a drinking glass), cut out 12 cookies. Transfer 6 cookies to each baking sheet (they will spread alot), spacing 1 1/2 inches apart. Bake until cookies are set and beginning to crack, about 8 minutes. Rotate rack position and direction of the baking sheets halfway through. Cool cookies on sheets for 10 minutes, than transfer to a cooling rack. Repeat with the remaining dough.

The cookies can be stored for a week in an air-tight container. Makes 24 cookies.

Recipe- Mushroom Pizza

Sometimes at the end of the week the diet goes out the window.

Not that I'm on a diet, but I try to keep my gastronomic adventures on a 'tight leash,' so to speak. My intense love of food is constantly at war with the desire to stay thin and fit. But at the end of a hard week, making something deliciously comforting really hits the spot. Making pizza at home sounds so impressive but the whole experience is satisfying. Making the dough, putting the pizza together....and eating it! Homemade pizza is sooo good.

Last night my friend A came over and we made pizza. I got the dough ready ahead of time in the bread machine. I love this recipe for whole wheat pizza dough; it's deeply flavorful, and healthful too. For this batch, I used a rosemary infused olive oil and the crust was deeply flavored with it, but you can use regular extra virgin olive oil.

Whole Wheat Pizza Dough

(makes 2 12-14 inch crusts)

1 1/3 cups water
1/4 cup rosemary olive oil
2 1/2 cups unbleached all-purpose Flour
1 1/2 teaspoons salt
2 teaspoons SAF yeast

Place all ingredients in the bread machine pan, and program for the dough cycle. Press start.

When the machine beeps at the end of the cycle, unplug the machine. Lightly flour your work surface, and your hands- the dough will be sticky when you pull it out. Immediately remove the pan from the machine, and turn the dough out onto the floured work surface. Divide into the desired number of portions. Flatten each portion into a disc by kneading a few times then folding the edges into the center. Cover with a damp paper towel on the work surface to rest for 30 minutes until the dough has increased about 20 percent in size.

Roll out and shape the dough according to your pizza recipe. Or, place dough in a plastic food storage bag and refrigerate for 24 hours, or freeze for up to 3 months.

A is a terrific pizza buddy. We had never cooked together before but we instantly danced in the kitchen- I rolled out the dough while she prepared the mushrooms and cheese. We have similar tastes in toppings, so we decided on a mushroom pizza with a spicy arrabbiata sauce. While preparing and eating, we shared a terrific bottle of Castle Rock Zinfandel.

Mushroom Pizza

1/2 recipe Whole Wheat Pizza Dough
3 large crimini mushrooms, sliced
4 cheeses, amounts to taste- part-skim mozzarella, fontina, parmesan, and asiago
your favorite Arrabbiata (spicy) tomato sauce (we used Scarpetta brand, available at Whole Foods)

Place a pizza stone on the bottom rack of your oven, and preheat to 475 degrees Fahrenheit.

Roll out pizza dough on a lightly floured work surface, to desired shape and size. Transfer to a baking sheet that has been lightly sprayed with olive oil and sprinkled with cornmeal. Spread a small amount of tomato sauce over the crust, leaving 1/2 inch around the edge. Sprinkle with cheese, and arrange mushrooms on top. Bake for 15-18 minutes, until the crust turns golden brown and the cheese bubbles. Transfer to wooden cutting board and sliced into 8-10 pieces. Store leftover pizza in tightly wrapped foil in the refrigerator.

The mushroom pizza paired with the delicious Zinfandel was delectable comfort food on a rainy chilly Friday. We had considered going out but were so glad we stayed in. Our pizza was deliciously satisfying comfort food without all the grease of delivery pizza. Plus, New Husband gets the leftovers for lunch today!


Thursday, September 20, 2007

Recipe- Apricot Almond Rugelach


Rugelach are a traditional German Jewish pastry, but they've long been a traditional Christmas cookie in my family's house. My parents and brothers are bigger on pie and cake throughout the year, but once Thanksgiving is over it's all about the Christmas cookies. Mom makes 6-10 different kinds during the holidays- some new and some old standbys. Some are beautiful works of art, others aren't as pretty but taste just as good.
These apricot rugelach are on the 'Must make' list. In fact, they are often made twice a season, and should they not appear there would be cries of despair from us all.

Our first experience with rugelach occured when I was a little girl living in Atlanta. Beyond the neighborhood Kroger, Mom would visit Harry's a local warehouse grocer (Whole Foods slash Home Depot? best way I can think to describe it). My very first experience with sushi took place here as well, but that's another story. But on special days, Mom would purchase chocolate walnut rugelach, and at least 3 would be consumed on the way home (myself, Brother #1 and Brother #2) and the rest didn't last much longer. We didn't stay in Atlanta long and it was a few years before rugelach entered our lives again in the form of this recipe.

Now I have my own home but we'll still be home for Christmas so we won't miss the cookies. But it's never too early to practice the family favorites, so I made my first batch of apricot rugelach solo this weekend.

I learned alot- my first experience with cream cheese dough taught me that Mom was right as usual- it is easy to work with! I was a little concerned in the beginning- the dough didn't come together as fast as I thought it would, and I worried I had done something wrong. But lo and behold, it came together beautifully. You separate the dough into two parts and work with one at a time. Only when working with the second piece of dough did I remember that we received a fluted pastry wheel as a wedding gift- so one batch had lovely scalloped edges and the other was plain. But no problem- they still tasted great! And I can't wait to make another batch- soon, since I have 1/2 a block of cream cheese left and I'm not sure what else to do with it. But next time, I think I'll try a chocolate walnut raspberry filling, reminiscient of the cookies I had at Harry's. I'll let you know how those turn out!

Apricot Almond Rugelach
(adapted from Cookies Unlimited)
makes 24 cookies


cream cheese pastry:
1 cup all-purpose Flour
8 Tablespoons (1 stick) cold unsalted butter, cut into 12 pieces
4 ounces cold cream cheese, cut into 12 pieces

filling:
1/4 cup apricot jam
2 ounces (about 1/2 cup) chopped toasted Almonds
1/4 cup sugar
1 Teaspoon finely grated Lemon zest

topping:
1 egg
1/4 cup sugar
1 ounce (about 1/4 cup) chopped almonds

2 cookie sheets covered with parchment

Preheat the oven to 350 degrees Fahrenheit.
In the work bowl of a food processor fitted with a steel blade, combine the flour, butter, and cream cheese. Pulse until the dough forms a ball. Remove the dough from the work bowl and divide into two pieces. Place each on a piece of plastic wrap and press each out into a 6-inch disk. Wrap in plastic and refrigerate while preparing the filling.


To make the filling, you'll need 4 bowls: in the first, stir the jam until it is spreadable; in the second, stir together the almonds, sugar, and lemon zest. In the third bowl, beat the egg until well broken. In the fourth bowl, mix the sugar and almonds for the topping.
Remove one of the pieces of dough from the refrigerator and place on a lightly floured surface. Flour the dough and roll it out into a 9- to 10-inch circle. Spread with half the jam and half the almond mixture. Using a pastry wheel, cut the circle into 12 equal wedges. Roll up each triangle into a small crescent from the outside inward. As the rugelach are formed, place them on the prepared pan. Repeat with the second piece of dough and the remaining filling.
Brush the top of each pastry with the beaten egg, then sprinkle with the almond sugar.
Bake for about 30 minutes, or until golden and slightly caramelized. Slide the papers from the pan to a cooling rack.


Rugelach are best the day they are baked, but they will keep between sheets of parchment in a tight-lidded container. But trust me, these won't last longer than a day or two anyway!


Friday, September 14, 2007

Recipe- Lasagna with Pesto and Fresh Tomatoes

I've made many recipes, and I often modify them if they need improvement, or to just make them more my own. This often suits if I simply don't have exact ingredients and work with what I have.

I have officially written my first recipe from my own head, and I'd like to share it with you here. I prepared it last night, and New Husband was quite pleased with the results. I'd like to tinker with it a bit more and will share the evolution with you, but here is version 1.0. I made it for 2, but you can easily double the recipe if you have a larger crowd.

Lasagna with Pesto and Fresh Tomatoes

pesto:
1/2 bunch fresh basil
1/2 cup walnuts, toasted
a handful of fresh baby spinach
1/4 cup part skim ricotta
2 Tablespoons parmesan cheese
3-4 Tablespoons walnut oil
warm water
salt and pepper to taste

2 portobello mushrooms, cut into chunks
1 Tablespoon walnut oil
salt and pepper

4 large tomatoes, cut into chunks, with 4 slices for garnish
about 3/4 cups shredded cheese- I used
a fontina, parmesan, and asiago blend
8 no-boil lasagna noodles

Preheat oven to 425 degrees Fahrenheit.

For the pesto: place basil, walnuts, spinach, ricotta, and parmesan in a food processor and pulse to combine. With the processor running, add the walnut oil, and then the warm water to create a fairly liquid consistency. Add salt and pepper to taste.

For the mushrooms: Toss with the walnut oil and salt and pepper. Spread out on a baking sheet and roast for 15-20 minutes. Remove and drop the oven temperature down to 350 degrees.

To assemble the lasagna: Place the lasagna noodles in a large dish and pour boiling water over them. Soak for 10 minutes, tossing to make sure the noodles don't stick together. Drain the noodles on paper towels, and set aside.
Spread a heaping Tablespoon of pest on the bottom of an 8 x 8 baking dish. Lay 2 pasta noodles down and spoon pesto to coat all over lightly. Layer tomatoes to cover, followed by 1/4 of the mushrooms. Sprinkle some of the cheese on top. Repeat with the noodles, pesto, tomatoes, and mushrooms and cheese 2 more times, using all the mushrooms on the last layer. For the final layer, add the remaining noodles, and the four reserved tomato slices. Top with the remainder of cheese.
Cover with tin foil and bake for 25 minutes. Remove the foil and bake for 20 minutes more. Remove and let sit for 5 minutes before cutting. Serve.

Serves 2.

The lasagna came out really well; it was flavorful and delicious. I think my improvements on future try would be to tinker with the amounts of tomatoes and mushrooms. The pesto is a lighter pesto but still rich, so more fresh tomatoes would be welcome. And we love mushrooms, so more is always good! In short, we devoured the majority of it which is saying alot of New Husband who can't eat much of just one thing.