Tuesday, August 24, 2010

The Dresser Has Arrived!

Any new furniture is exciting. Today the dresser finally arrived!

It was delivered this morning at 8:30am while I was eating breakfast. As you can see it's also our changing table; the topper came separately and the men were nice enough to install it for me.

I can't wait to fill the lower drawers with her little clothes and stock the top ones with diapers, wipes, and lotion. First I want to put in some nice liners, and I'm thinking about switching out the knobs for some pretty lavender or yellow ones from Anthropologie. These are fine but they're huge and plain.


Originally I wanted the dresser on the other side of the room, but after much haggling this weekend Ray convinced me that it has to go here due to space issues with the other elements- the glider and ottoman will take up more room than I had thought, and we'll have a bookshelf too. I didn't love the idea of it just inside the door because of the view in the room- also potential stinkiness from the changing table right there :P. That's probably a fruitless concern, and the pale yellow glider will look pretty in the far corner. Really cannot wait until those items are here too!

Saturday, August 21, 2010

Spaghetti Carbonara


Here's a repeat because I didn't write out the recipe the first time.
Carbonara tastes like a special meal but it couldn't be easier. I can't think why it's not already in the rotation for entertaining. How many people do you know who don't like pasta, eggs, and bacon? I don't think I know any.

Spaghetti Carbonara
serves 4

6 ounces thick cut bacon, cubed
3 eggs
1/3 cup grated parmesan
1/3 cup grated romano cheese
handful flat-leaf parsley, chopped
1 Tbs olive oil
2 garlic cloves, smashed
1 lb dry spaghetti
1/2 cup white wine

Put a large pot of water on the stove to boil.
~
In a large saucier or skillet, cook the bacon over medium-low heat until the fat is rended and the bacon is crisp, 12-15 minutes. Remove the bacon to a plate lined with paper towels, and pour off all the fat but one tablespoon. Add up to a tablespoon of olive oil and add the garlic. Cook until golden brown, then discard the garlic and turn off the heat temporarily.
~
Meanwhile, beat the eggs, cheese, and parsley until frothy in a large serving bowl. Set aside.
~
When the water boils, add the pasta and stir occasionally. When it has just a few minutes left, turn the skillet back on over medium heat, add the white wine, deglaze and reduce. Add the bacon back to the pan and stir well. When the pasta is cooked, drain and add to the serving bowl. Immediately toss the pasta and egg mixture with tongs to incorporate the sauce and coat the spaghetti well. Add the bacon and white wine mixture and continue to toss until well combined.
~
Adjust salt and pepper to taste and serve immediately.
~
This dish is best served immediately on the first day, but leftovers are still great microwaved with a tiny bit of added moisture.


~::::~

Friday, August 20, 2010

courtesy of Eaterwire:

A press release circulated today announcing San Francisco-based Foodbuzz has beaten FoodNetwork.com and Allrecipes as the #1 online food property. It has just passed 11 million users and 4,000 food blog partners.

Yay Foodbuzz, congratulations!!!
~:::~

Monday, August 16, 2010

C is for Chocolate Chip Cookie

Heaven help me, this is in the other room. Just a few yards away.

Close enough that the aroma in here is strong. But that picture needs to be the same when Ray gets home.

It's important to always have cookies in this house, storebought or homemade. They are the easiest sweet treat to grab on the way through the kitchen, the perfect dessert to stash in a lunchbox, and ideal for presentation to unexpected guests. I'm too neurotic for many unexpected guests, but I do need to cover the lunchbox and the drive-by snacker that I live with.

When we run out of packaged ones (Pepperidge Farm Milanos and Strawberry Veronas, Oreos, and Chips Ahoy are lunchbox favorites) and I don't want to buy more, I bring out the unsalted butter and eggs to sit on the counter for a couple hours.

A few puffs of flour and a sink of baking utensils later, and I have a kitchen that smells divine and a test to my iron will. Yes I am a lady with a baby, but dammit I still try to stick to my "dessert on weekends only" rule!

The problem is that it's Monday and these cookies may not make it that long.
And like I said I'm a lady with a baby and nobody's watching- I don't know if I could stop at just one! For posterity, I made 24 cookies, there should be 24 cookies here!
These chocolate chip cookies are so very easy, chewy in texture and well-studded with a mixture of semi-sweet and milk chocolate chips. I'm not fancy with the shaping of my drop cookies- that's part of their beauty, just drop in a ball on the sheet and let the oven shape the rest.

Chewy Chocolate Chip Cookies
makes about 24 large cookies

2 cups plus 2 Tbs all-purpose flour
1/2 tsp baking soda
1/2 tsp salt
1 1/2 sticks (12 Tbs) unsalted butter, softened to room temperature
1 cup packed light brown sugar
1/2 cup granulated sugar
1 egg
1 egg yolk
2 tsp vanilla extract
1 1/2 cups semi-sweet and milk chocolate chips (or one or the other)

Adjust the oven racks to upper and lower-middle positions, and heat to 325 degrees Fahrenheit. Line two cookie sheets with parchment paper.

In a stand mixer, cream the butter and sugars together until smooth and well blended. Meanwhile, whisk the flour, baking soda, and salt together in a medium bowl and set aside.

Beat the egg, yolk, and vanilla into the butter-sugar mixture until combined, scraping down the sides of the bowl as needed. Add the dry ingredients slowly at low speed until just combined, scraping down the sides again. Add the chips and let the mixer turn twice before turning off and stirring by hand the rest of the way to blend in the chips.

With two big tablespoons, drop largish balls of dough onto the lined baking sheets, twelve per sheet. [I usually make smaller cookies but today I was going big. To make them smaller, use teaspoons.]

Bake, switching the baking sheet positions halfway through, for 20 minutes until just golden brown. Let cool for 3-5 minutes before moving the parchment paper to cooling racks. When completely cool, peel the cookies from the parchment paper.

~::::~

Friday, August 13, 2010

Paprikash


In less than four months I will be someone's mommy. It's an exciting thought.
A seriously daunting one too.

It will be my job to teach, guide, support, and mold this little person into someone good, kind, smart, and curious. Not on my own; children are raised by a village and all this weight doesn't just fall on my shoulders. But parenting will be my primary concern and I'll wear the badge of stay-at-home mom proudly. Teaching my kids in the kitchen will be very important to me. Lessons in teamwork, kindness, care, culture, and history can be taught over the stove and oven.

Being pregnant, there are lots of discomforts- fatigue, back soreness, indigestion, shrinking wardrobe, etc. But food. Food is very important. I look forward to each meal with great anticipation, planning and preparing with more furvor and focus. I'm trying new foods, but also revisiting old ones.
Food memories are really important to me. They bring me back to a place and time like nothing else can, reminding me of how new things are great, but old ones can be greater. Recently I'm thinking more about recipes from my grandmothers and replicated by my Mom. Now it's my turn to document, create, and share them with my own family.

This recipe comes from my Mom's paternal grandmother. They were Croatian but lived in Hungary; she taught my grandma this recipe when she married my grandpa.

Grandma Irene was special as a young woman and as a grandmother. She looks like a movie star in the black and white wedding photo that sits on my mantel. She was loved by all, referred to as 'Mommy' by her seven adult children which I love.
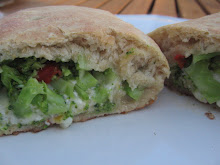
She died in a car crash when I was 6 so my memories are limited to her outstretched arms when we arrived for a visit, and working in the kitchen in an apron with a dish towel over one shoulder. My Mom had chicken paprikash growing up, and she made it for us countless times. The sweet paprika and sour cream are common to Hungarian cuisine. It's an easy, one pot meal; the sour cream sauce may remind you of beef stroganoff. I'm not a fan of that dish but I love this one.

Our version has a twist added in our house- served with rice instead of the traditional noodles. My Greek father prefers rice as a side dish, and so do I. Rice is actually a better match because it soaks up the yummy sauce in a way that pasta can't, but you can do what you like.

My own change is using brown rice instead of white. In my experience, men have a harder time wrapping their brain around it, so I've learned to cook brown rice with a bit more water and for a longer time. The rice gets softer and loses its chewy edge, making it more palatable for picky eaters. And I don't forget to salt it, this is also key.
Serve this meal with a big salad, dressed in olive oil and red wine vinegar, and some chopped fresh dill- an herb used in lots of Hungarian cooking.

Chicken Paprikash
serves 6

3 lbs bone-in chicken thighs and legs, skin removed
1 large yellow onion
2 1/2 Tbs sweet paprika
1 Tbs flour
1/2 cup water
salt and pepper
3/4 cup light sour cream

In a large heavy-bottomed pot, brown chicken in 2-3 batches for about 4 minutes on each side. Meanwhile, chop a large onion.


And try not to cry too much.


Saute the onion slowly over low heat until soft, then add the paprika and the flour. The onion will be pretty red, that's what you want. Return the chicken to the pot and add the water to moisten, as well as salt and pepper. Cover and simmer over low heat for about 1 hour.

When the meat is cooked through, remove it and skim as much as you can from the sauce. A light simmer will help the fat move to the edges which makes this a little easier. I'm not great at getting it all, but I do my best and don't worry about it.

Add the sour cream to the sauce and whisk well until combined. Return the chicken to the pot and stir well, adjusting seasonings as needed.

Serve over rice for our way, wide noodles if you want to be traditional. It's better with rice, trust me.

~:::~

Monday, August 9, 2010

Grilled Veg Two Ways

Let's talk about vegetables. Grilled ones.


Lightly charred, smoky, soft, succulent morsels of carmelized, nutritious veggies. Who needs steak when you have a portobello fresh from the grates? Grilling is the summer form of winter roasting, when the idea of opening a 400 degree hot box is close to suicide.

The hardest part is walking outside to turn on the gas. And trying not to cut myself while I prepare the vegetables. I do that a lot. If you can muster these two things you'll be pleased with the results. I've watched veggie converts take place right before my eyes. Ray has learned to love lots of veggies when they're prepared this way.


I like to grab an armload of vegetables at the beginning of the week and grill them as I go. Portobellos, bell peppers, and zucchini are some of my favorites and are perfect for the grill method.


This week I doubled this recipe and did the same thing twice: Once for lunch in salad bowl form, and again for dinner with pasta.


Grilled Vegetables

1 giant portobello mushroom, sliced thick
1 red bell pepper,
1 yellow bell pepper,
1 orange bell pepper- innards removed and sliced thick
2 zucchini, ends trimmed and sliced lengthwise in four pieces each
salt
garlic olive oil

Put all the chopped vegetables in a large bowl and add salt and a glug of garlic olive oil. Toss with tongs.

Heat the grill to medium-high, about 375 degrees. Place vegetables in a single layer directly on the grates. Close the lid and let cook for a few minutes. It's not exact, just ballpark it. Check the veggies and when they have nice grill marks, turn them with tongs and cook covered for another several minutes. When the veggies are a bit charred and soft, remove and let cool for a few minutes. The zucchini and mushrooms should cook a wee bit faster than the bell peppers; just remove them first and leave the peppers on a bit longer.

For the pasta, sliced the vegetables in thin strips and add to a large bowl. Julienne 2 tablespoons of fresh basil and add to the vegetables. Meanwhile, cook fettucine or other noodles to al dente. Add drained pasta to the vegetables and drizzle with a bit more garlic olive oil to moisten. Add some fresh goat cheese and toss.

Garnish each plate with a bit more goat cheese.


~ OR ~

Use the grilled vegetables for this delicious lunch bowl.

Roughly chop slightly cooled vegetables into bite-sized pieces and throw in a bowl. Chop two hard-boiled eggs- one whole egg, one egg white- and add to the bowl. Sprinkle with crumbled feta cheese and bon appetit!
. . . . It was gone before the camera made it out. Hungry pregnant girl is no match for food blog photography.

~::::~

Friday, August 6, 2010

Slush

It's unseasonably cold here for summer. Bay Area microclimates can mean 15 degree differences in a short distance, but the chill here is not the norm. San Francisco is notorious for its chilly summers, but outside the Fog City it should be hot. San Mateo can be windy year-round, but I'm not accustomed to digging for long sleeves in August.

Being six months pregnant, I'm not complaining at all. I have a lower tolerance for the heat, so the cool air feels like a personal gift to me. It's still nice out- sunny everyday with some warmth with it- but I'm not sweating as I sit.
Luckily the low temps don't mean we're deprived of California's fresh summer produce that comes with the season. We're still gorging on corn, zucchini, cherries, peaches, tomatoes, strawberries, basil . . .


And watermelon. Its appeal occurred to me in the last few years; we had it as kids but I'd reach for berries or stone fruit instead. Now I love its mild sweet flavor and watery texture. Right now that extra water is helpful with hydration as well as the nutrition it provides- vitamins C, A, B6, and B1, potassium and magnesium. About 50 calories in a cup makes it a low calorie snack option too.

For a fun snack with some balance, I puree the fruit with some plain yogurt, ice, vanilla, and some xantham gum for thickness. That latter turns a smooth drink into a spoonable bowl. Topped with a little garnish. You have to have a bit of garnish on something in a bowl. It's quick to make; it actually takes longer to clean up the food processor. Which may be the one downer to this snack.


Watermelon Slush

1 cup watermelon
1/2 cup nonfat plain yogurt
4 ice cubes
splash of vanilla
1 tsp xantham gum

Whirl all ingredients in food processor or blender until smooth and slightly thick. Pour into a bowl and top as you please. I like two teaspoons of granola.


~::::~